Signing and Notarizing a Mac App: Developer ID End to End
Signing and Notarizing a Mac App: Developer ID End to End
You build a Mac app, send the .dmg to someone, and they get a dialog saying it cannot be opened because Apple cannot check it for malicious software. The usual response is to tell them to right-click and choose Open, which works and is a terrible thing to ask a customer to do.
The real fix has three steps, and most people conflate them.
Signing, notarizing, stapling
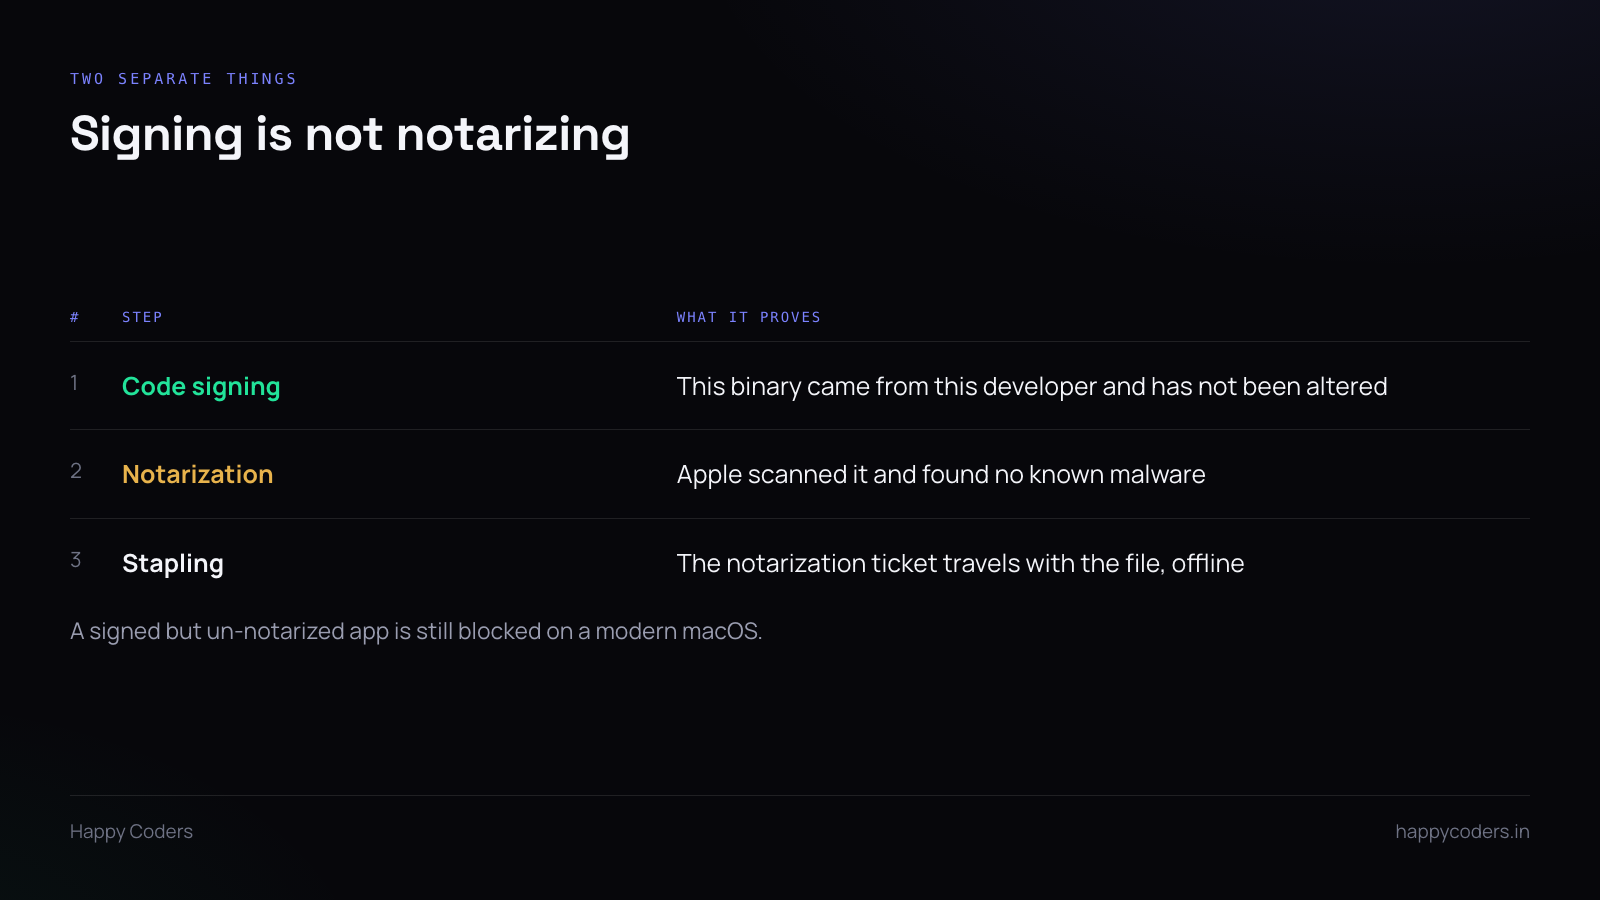
Code signing attaches your identity to the binary. It proves the app came from you and has not been modified since. You need a Developer ID Application certificate for this — not the Mac App Store distribution certificate, which is a different thing and will not work for apps distributed outside the Store.
Notarization is Apple scanning the signed app on their servers and issuing a ticket saying they found nothing malicious. This is separate from signing and it is not optional on a modern macOS. A correctly signed app that has not been notarized is still blocked.
Stapling attaches the notarization ticket to the file itself. Without it, Gatekeeper has to ask Apple’s servers at first launch, which fails on a machine with no network. With it, the file carries its own proof.
The order of operations
It matters, and getting it wrong produces errors that do not say what is wrong.
- Build the app.
- Sign the app bundle, with hardened runtime enabled and a timestamp.
- Build the
.dmgfrom the signed app. - Sign the
.dmgas well. - Submit the
.dmgfor notarization and wait. - Staple the ticket to the
.dmg. - Verify.
Two things trip people up here. The hardened runtime is required for notarization — an app signed without it will be rejected, and the rejection message is not especially clear about why. And the .dmg needs signing too; signing only the app inside it leaves the container unsigned and the download still looks untrusted.
Verify before you ship
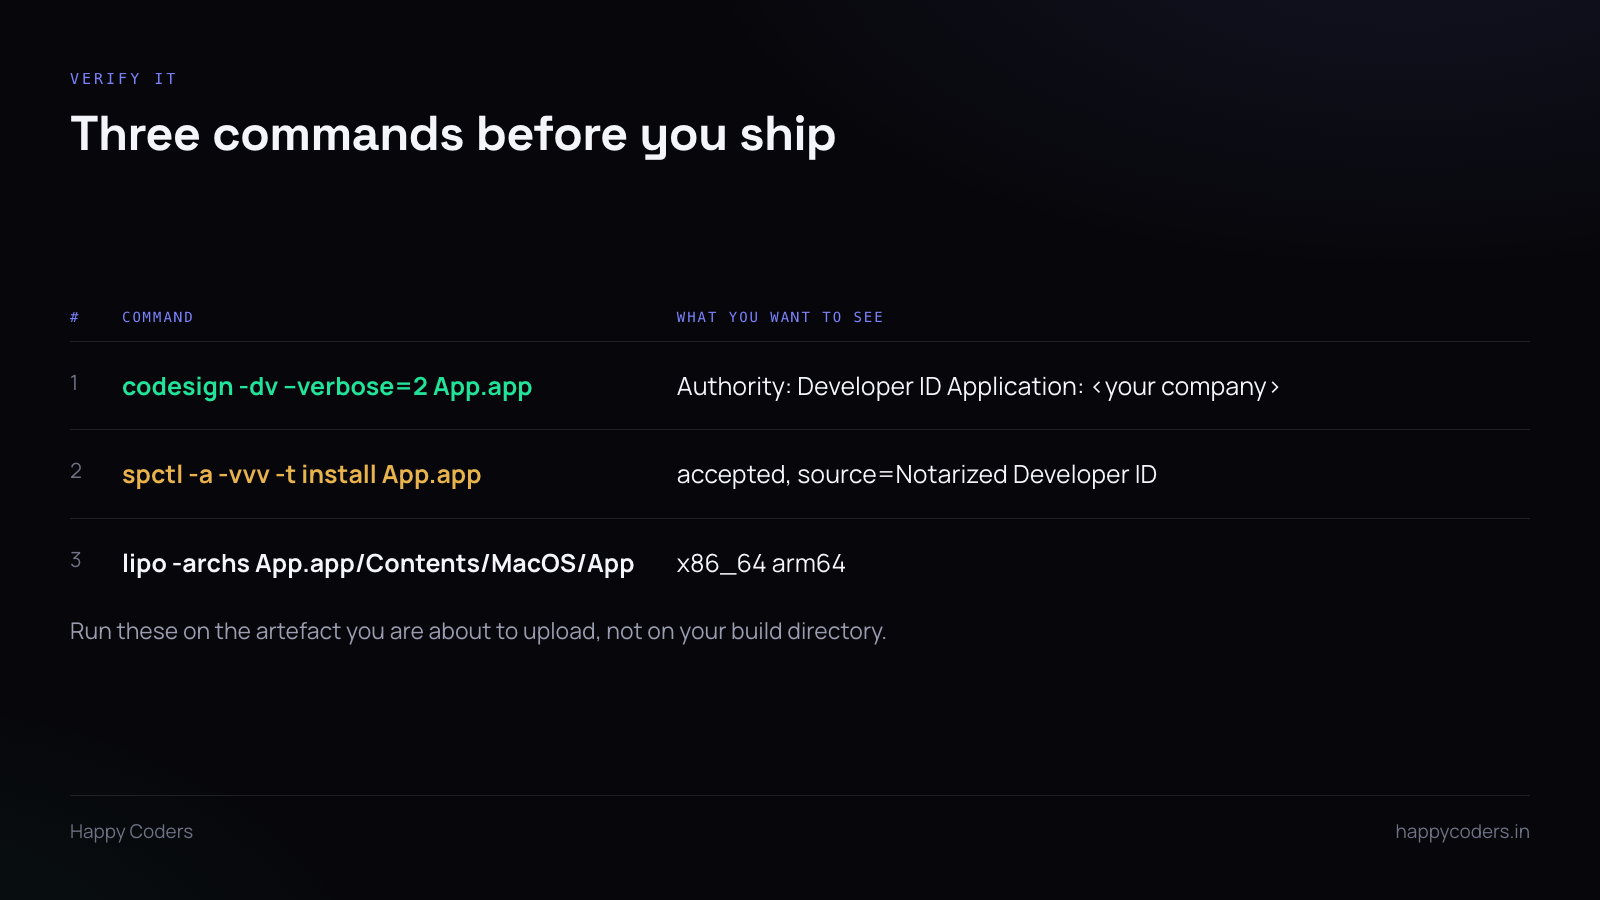
Three commands. Run them against the artefact you are actually about to upload — not the build output, not a copy you made earlier. Mounting the .dmg and checking the app inside it is the test that matters, because that is what the user gets.
codesign -dv --verbose=2 prints the certificate chain. You want to see Authority: Developer ID Application: followed by your company name and team identifier. If it says anything about a development certificate, or nothing at all, the signing did not happen the way you thought.
spctl -a -vvv -t install is the one that answers the real question. It asks Gatekeeper what it would do. accepted with source=Notarized Developer ID is what you want. If it says rejected, the user will see the dialog, whatever the signature says.
lipo -archs on the executable inside the bundle tells you which architectures are in it. Which brings up the thing people get wrong most often.
The architecture mistake
A plain release build on an Apple Silicon machine produces an arm64-only binary. It runs on your machine, it runs on your colleague’s machine, and it does not run on an Intel Mac at all.
If your website says the app supports Intel — and most do, because it is true of the code — then that claim is false for anyone who downloads the single-architecture build. The person on a 2019 MacBook gets an app that will not launch, and the page told them it would.
Building universal is a flag, not a rewrite. Add both architectures to the build, and then make the packaging script refuse to continue if the result is not universal. That check is worth more than remembering, because the day you forget is the day the release goes out.
One trap: with both architectures the output may land in a different path from the single-architecture build. A script that copies from the old path will silently package the old binary, which is still arm64, and every check downstream will pass because the binary it is checking is validly signed. It is just the wrong one.
Keep the private key
The Developer ID certificate is useless without its private key, and the private key exists in exactly one place unless you deliberately export it.
Export it to a .p12, put it somewhere safe that is not only the Mac it was created on, and write down where. Losing it means revoking the certificate and issuing a new one, and every app signed with the old one has to be re-signed and re-notarized.
Store builds are different
Worth saying plainly because it causes confusion: an app distributed through the Mac App Store is signed by Apple with a different certificate, and that build will not run outside the Store. You cannot take a copy of the installed app from /Applications and ship it as a direct download.
If you distribute both ways, you have two builds and two signing paths. They are not interchangeable, and the Store build’s architecture settings are a separate place to get the universal binary wrong.
What good looks like
On the final .dmg:
codesignnames your company and team idspctlsays accepted, Notarized Developer IDliposaysx86_64 arm64- The minimum OS version matches what the website claims
Four lines of output. Check them on every release, from a script if possible, because all four can regress silently and none of them produce an error at build time.